
Are you looking to take your small business to the next level without breaking the bank or getting tangled up in complex coding? One key aspect of running a successful business is having an efficient CRM (Customer Relationship Management) system. It’s crucial to capture, track, and monitor leads as they enter your sales funnel, convert into customers, and build lasting relationships with them.
The great news is that you don’t need to spend a fortune each month or possess advanced coding skills to implement a lead generation system and assess lead quality. In this blog post, I will show you how you can achieve all of this using free, no-code tools.
In this post, we will explore the power of Airtable and Make in automating the validation of email addresses. I will guide you through the process of creating an Airtable form to collect leads and defining the table structure. We will also customize the form view and create a Make scenario to automate the email validation process seamlessly.
By integrating the Hunter app’s email verification API into our Make scenario, we can conduct tests, analyze the results, and update the Airtable record with the validation findings. With conditional logic, we can designate specific fields based on the validation results.
While there are multiple ways to execute this process, I will focus on one approach that demonstrates the endless possibilities of integrating Airtable and Make. So, let’s dive right in and discover how you can revolutionize your small business with these free, no-code tools.
Getting Started – Creating and Defining an Airtable Base
Creating an Airtable form is a simple process that allows you to efficiently collect new leads. Airtable provides both the “front-end,” which is the form users fill out with their information, and the “back-end,” where lead details are stored, monitored, managed, analyzed, and more.
To begin, you need to create a new base in Airtable. Follow these steps:
- Click on the “+ Create a base” button shown below.
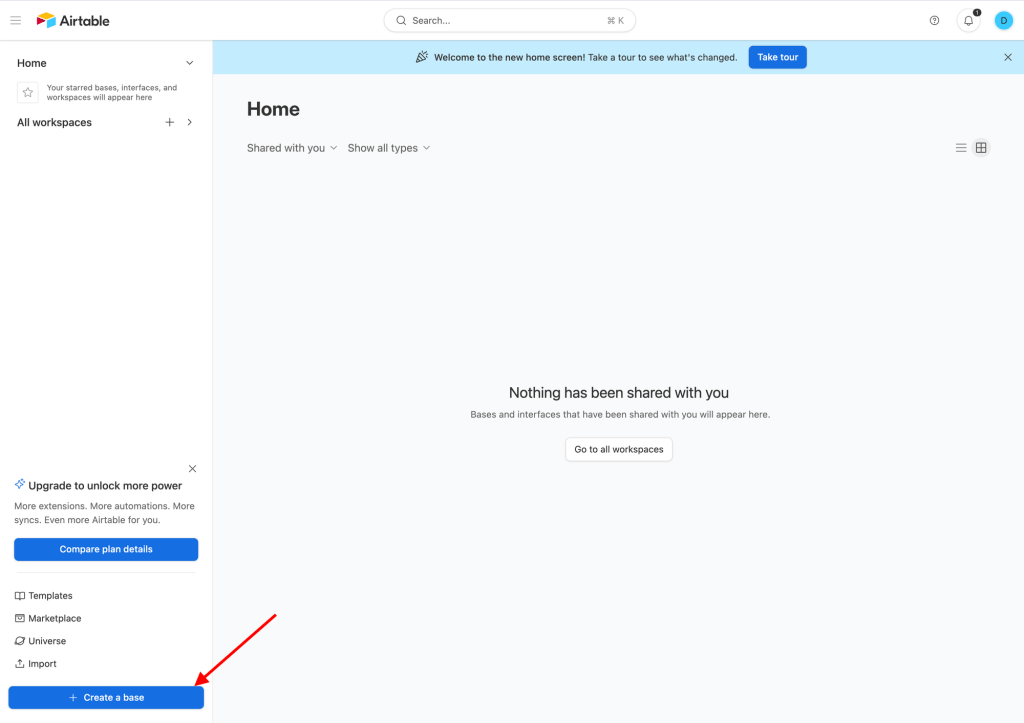
- Choose the desired workspace and access the base.
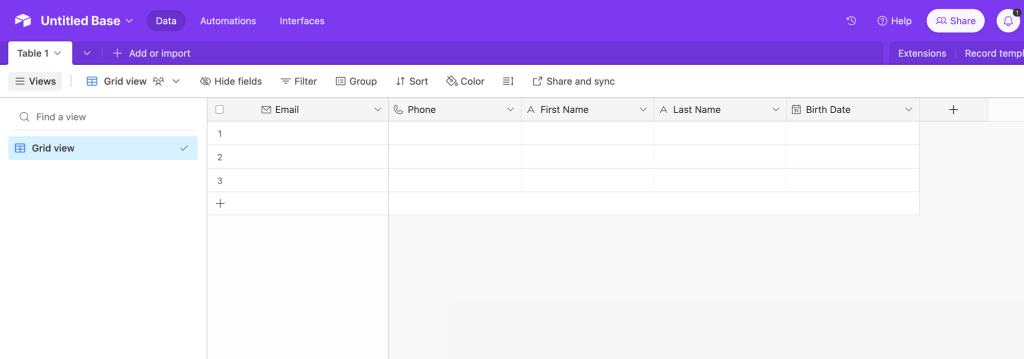
- You will see a table that resembles an Excel sheet. This table will gather all the data, so it needs to be designed accordingly. In our example, we will use the following columns to capture new leads:
- Phone number
- First name
- Last name
- Birth date
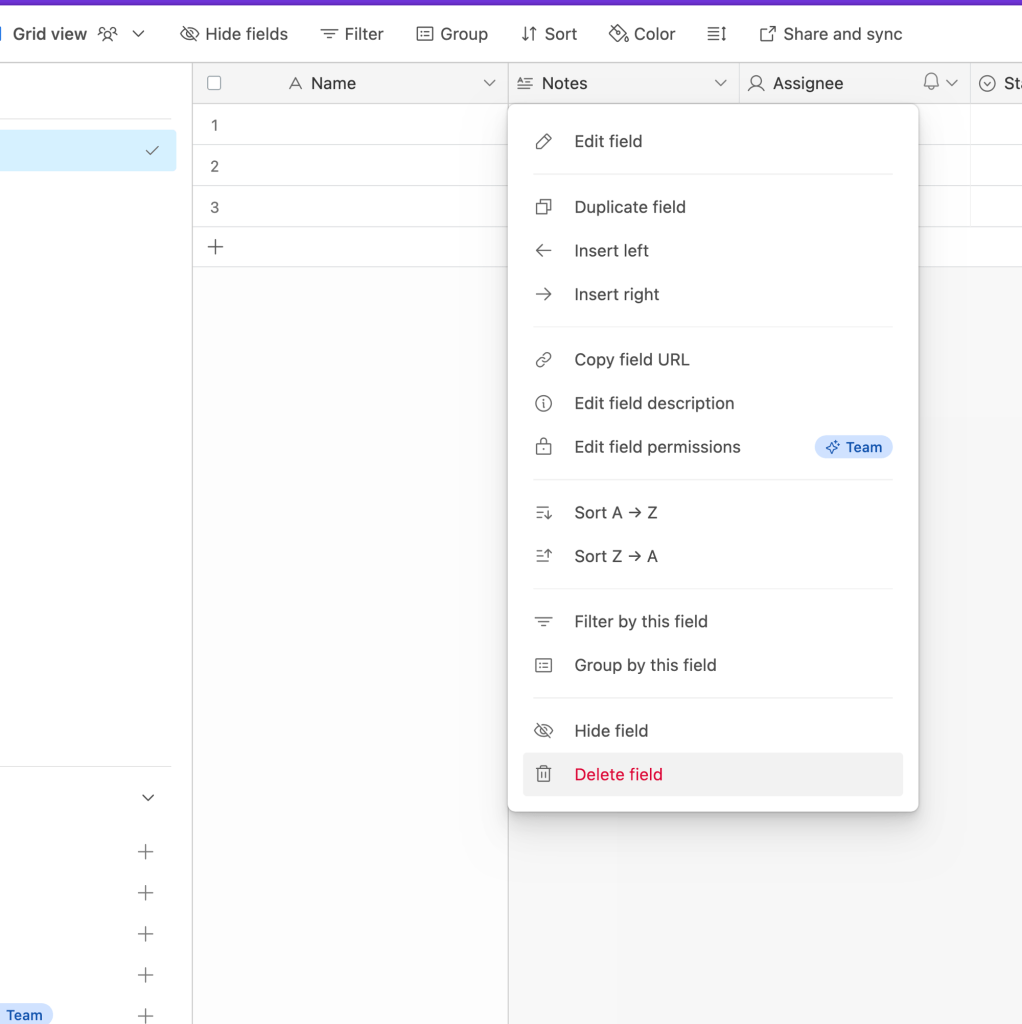
To modify the table, follow these steps:
- Remove all existing columns by right-clicking on them and selecting “Delete Field”. Note that the first column cannot be deleted.
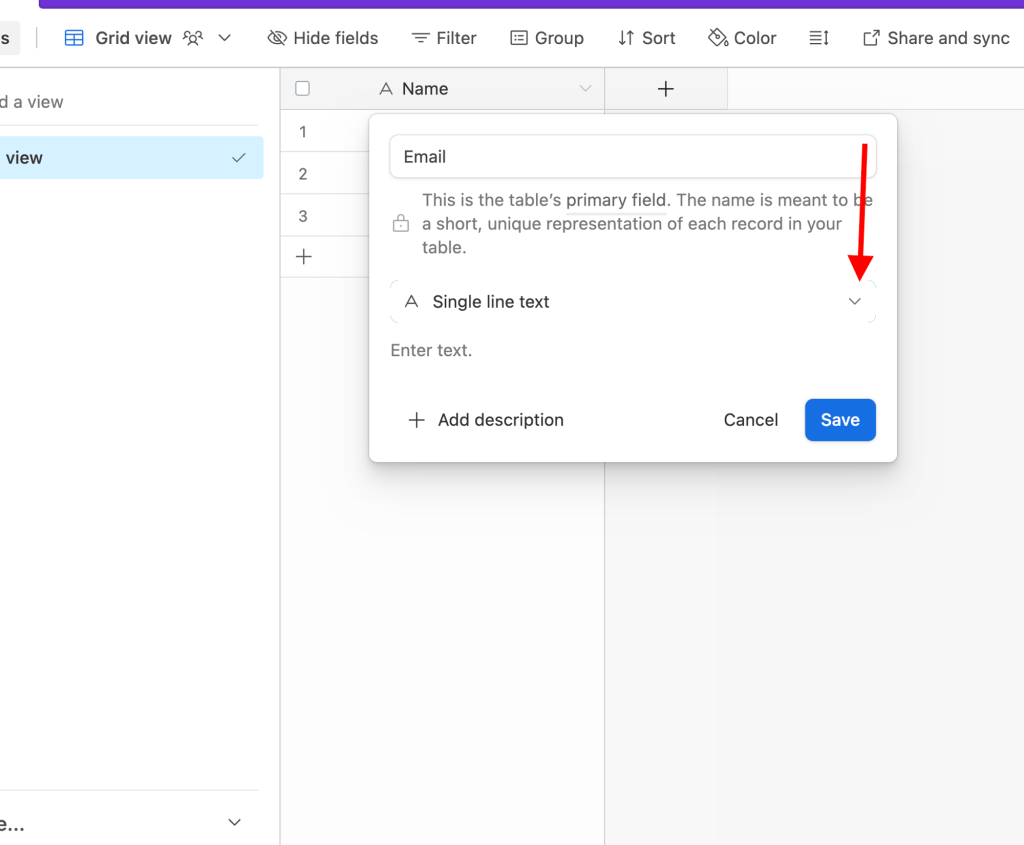
Change the name of the first column to “Email” and change its field type to “Email”.

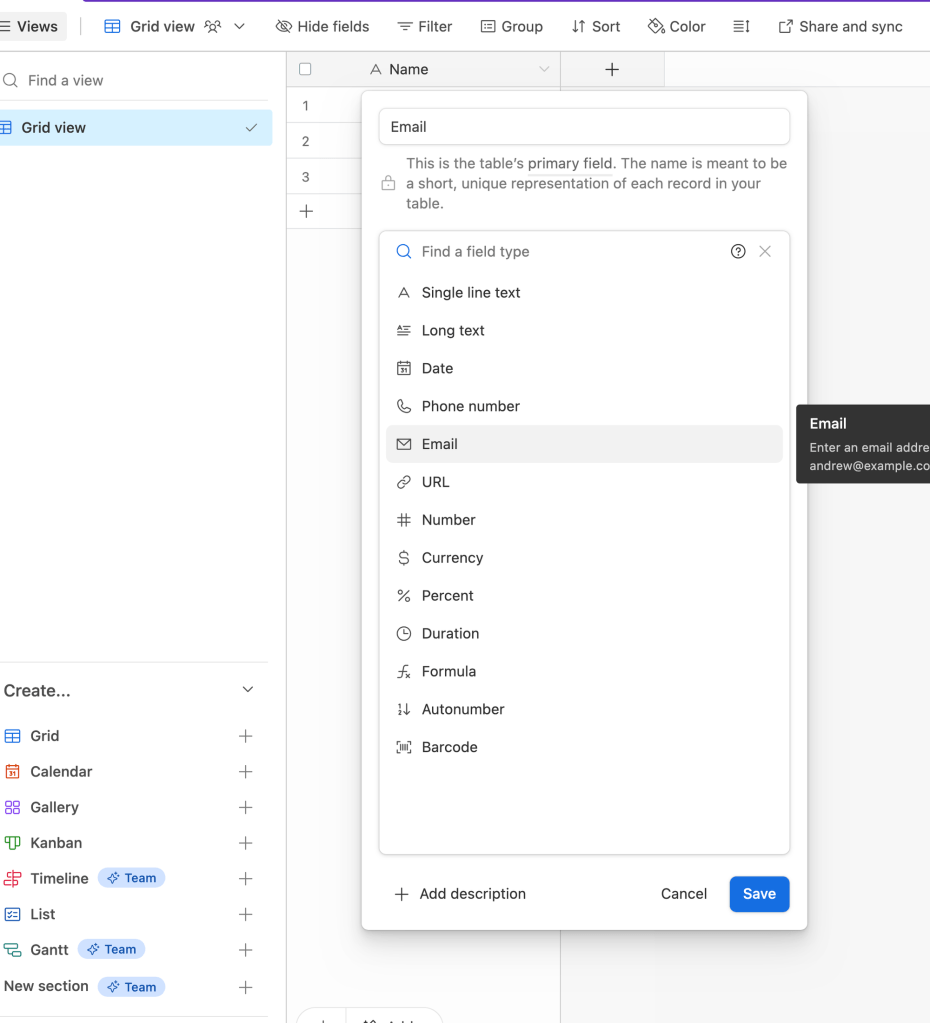
Add new fields by clicking on the plus icon on the right. Give each field a name and choose the appropriate column type. For example, choose “Phone number” for a phone number field.
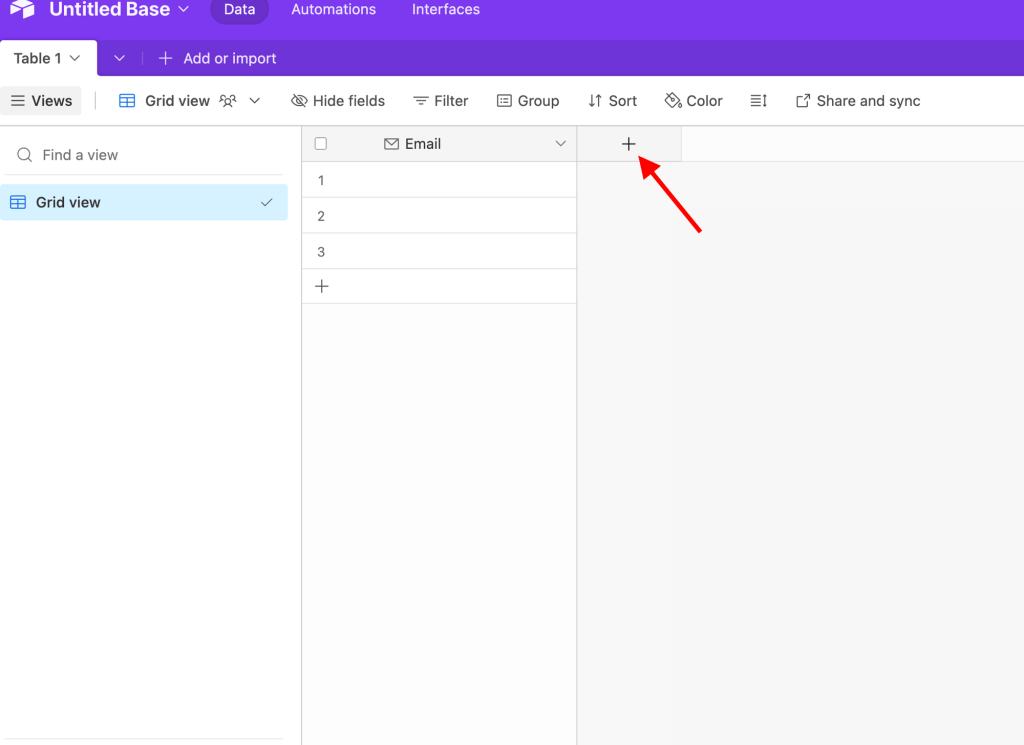
Continue adding the remaining fields with the appropriate column types until the table structure matches the desired form.
Next, we will add the “backend” columns, which will not be visible to the end user and will serve only for management purposes. As a new addition, include the “Validate Email” button, which will generate the entire process.

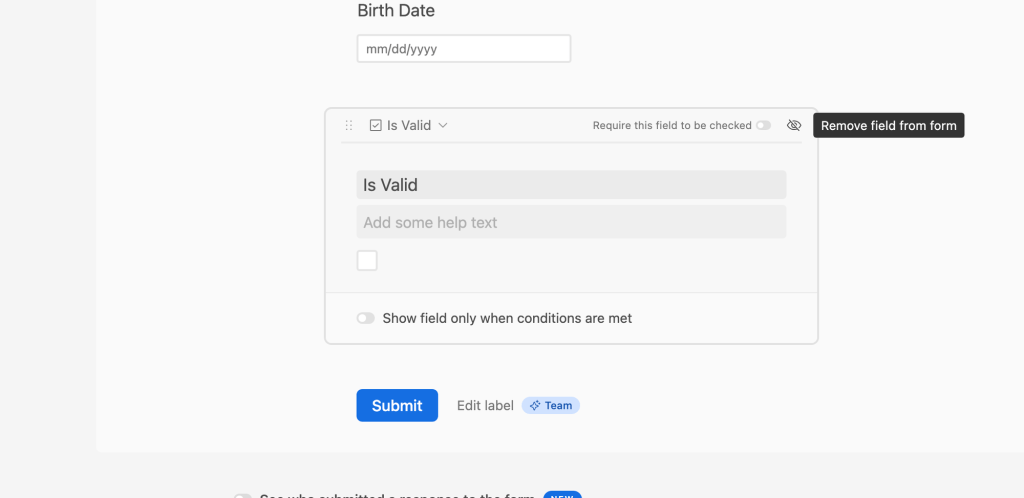
Create the “Is Valid” column, which will indicate whether the generated email is valid or not. Use a check box column for this.
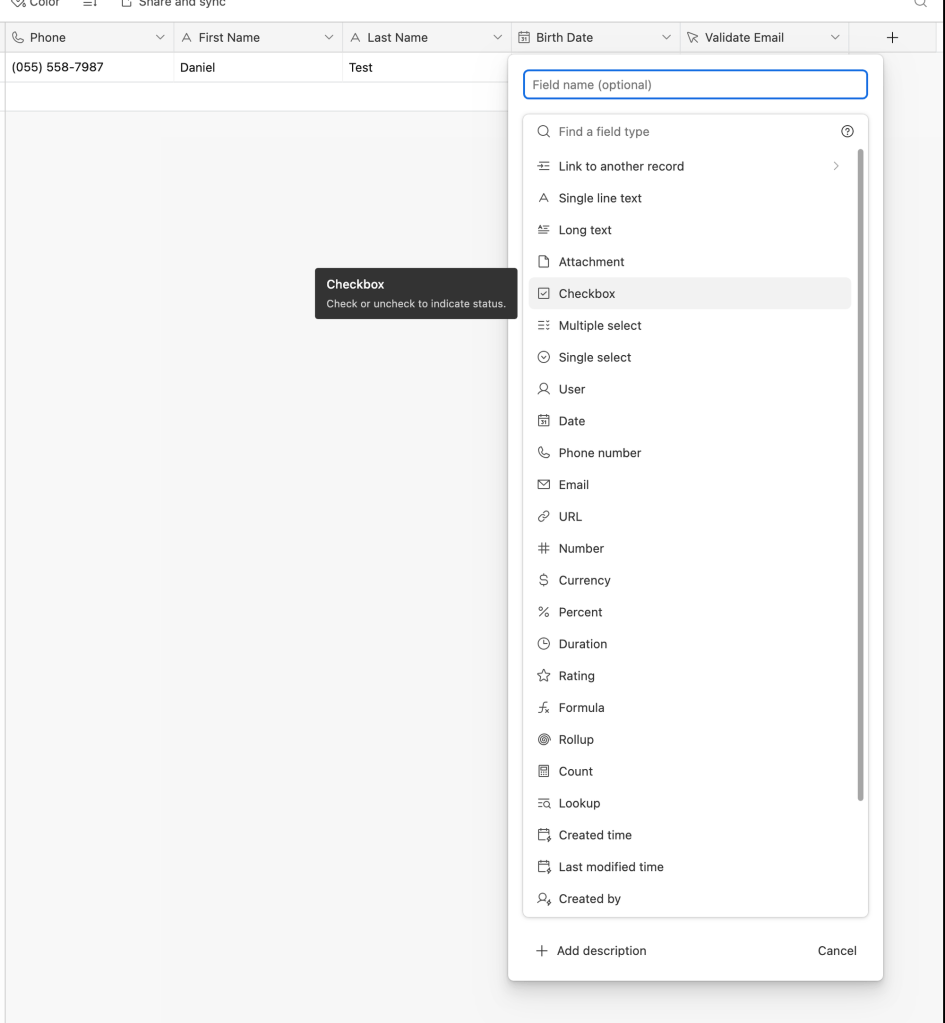
Finally, create a number field for the quality score of the leads, and a URL field that will contain the execution of the Make’s validation to better monitor the whole process. This field will serve as an indicator that the automation has successfully checked and validated the email.

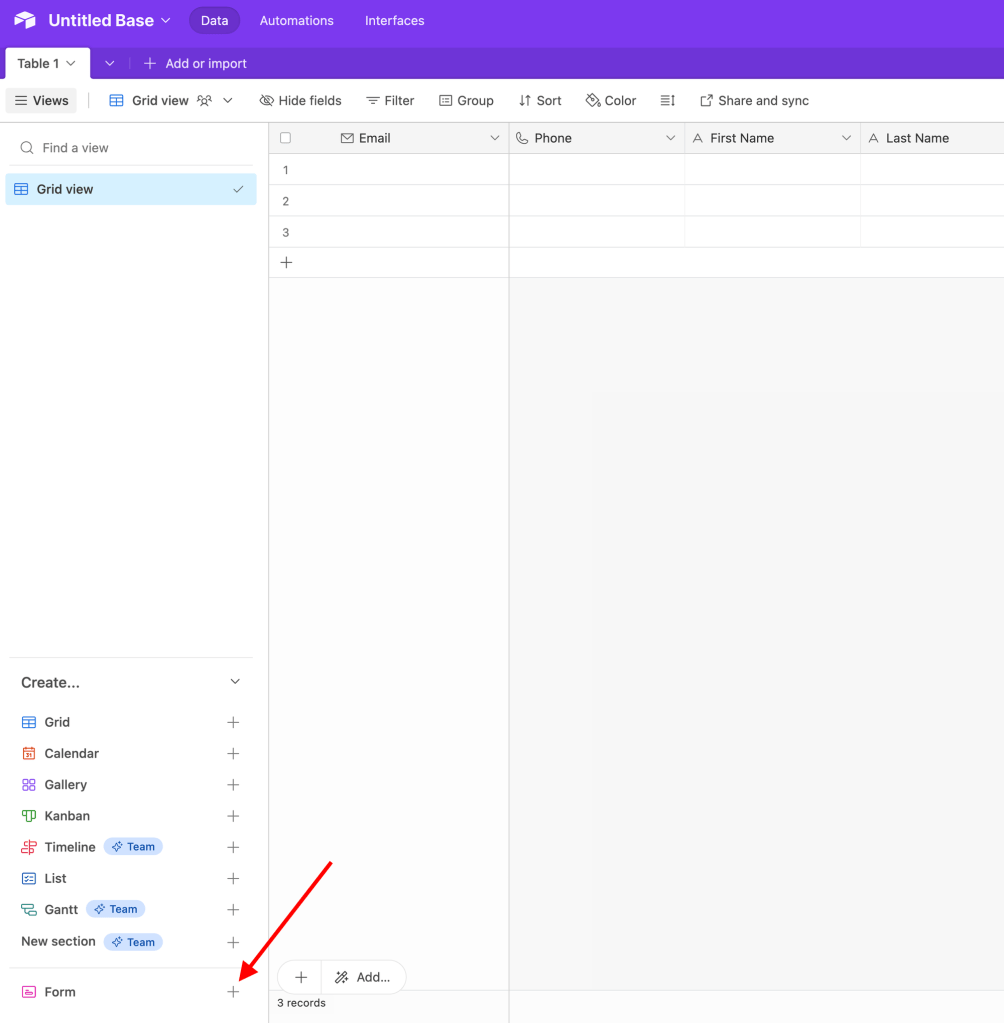
Now that the table structure is complete, you can proceed to create the lead generation form. Click on the plus icon next to “Form” to create the form view.
The form will display the same fields that were created in the table. Note that the button field does not appear in the form, as it cannot be edited in a form.
To hide the “Is Valid” checkbox, the quality score and the Make Execution URL from the form, click on the eye icon for both.
Airtable provides additional options to customize the form, such as adding a logo and a cover image. It also allows you to customize the process that occurs after form submission, such as displaying a message or redirecting to a URL.
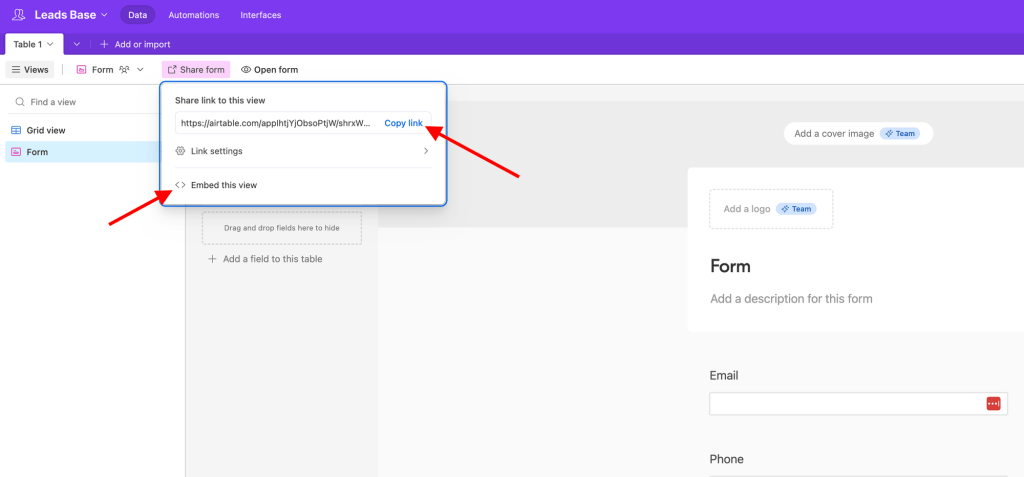
To use the form, you have two options. You can generate a shareable link from the platform, or you can embed the form anywhere on the web using a code. Simply click on the share icon and implement it wherever you prefer.
Now that the form is ready to be used, your system is prepared to generate fresh new leads for the business. Next, give the base a name and proceed to the next step, which involves creating a Make scenario.
Second Step – Creating a Make Scenario
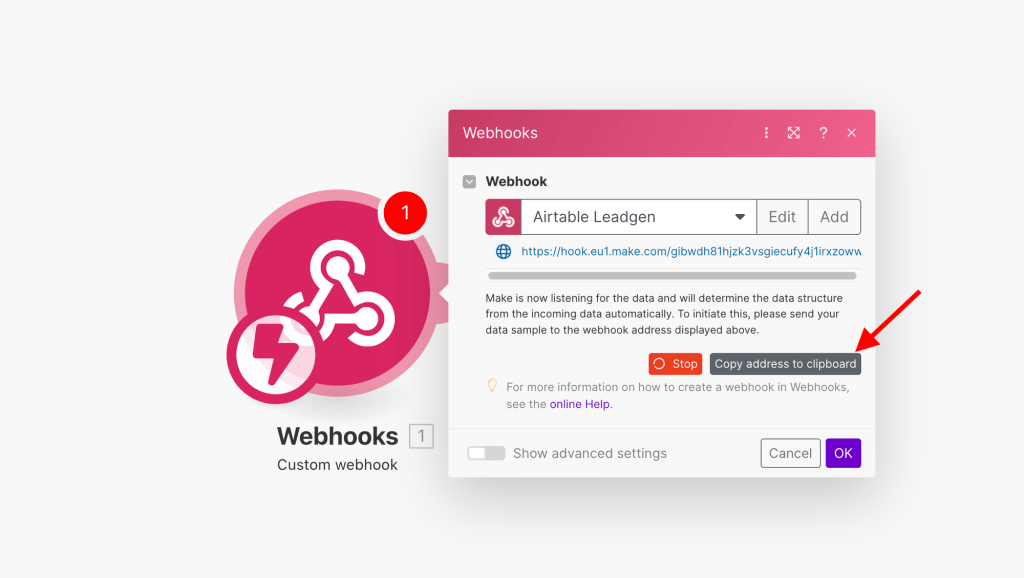
In Make, start by creating a new scenario. Instead of using the trigger based on Airtable, select the “Custom webhook” option from the Webhook module. This trigger will be activated when a button is clicked within the base. Click on “Create a webhook”, give it a name, click save, and copy the URL that is generated.
Now, let’s build the URL to send to our Make scenario from Airtable.
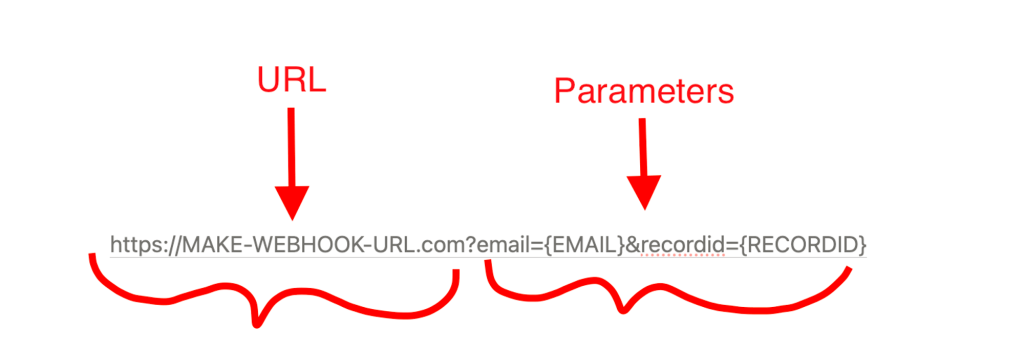
In order to properly validate the email, we need the email itself. Additionally, to update the base with the findings of the automation, we require the record ID (or the table’s row ID where the button was clicked). We can construct the URL as follows:
https://MAKE-WEBHOOK-URL.com?email={EMAIL}&recordid={RECORDID}
The part of the URL that appears after the question mark represents the URL parameters (email={EMAIL}&recordid={RECORDID}). As we can see, we have one parameter for the “email” and one for the “record ID”.
These parameters can be dynamic and are useful for establishing communication between the two sides. While we can add multiple parameters, for our example, only these two are needed. On the Airtable side, we will construct the URL as shown below:
"https://hook.eu1.make.com/gibwdh81hjzk3vsgiecufy4j1irxzoww?email="&Email&"&recordid="&RECORD_ID()
For those familiar with Excel, you may notice the similarity to building an Excel formula, where static and dynamic values can be combined. The URL starts with regular text enclosed in quotations, followed by the ‘&‘ symbol to add the dynamic value for the Email field. More regular text ("&recordid=") is then added to continue the URL string, followed by another dynamic value for the record (row) ID. Airtable provides various options to customize the button. As you start typing, suggestions will appear.
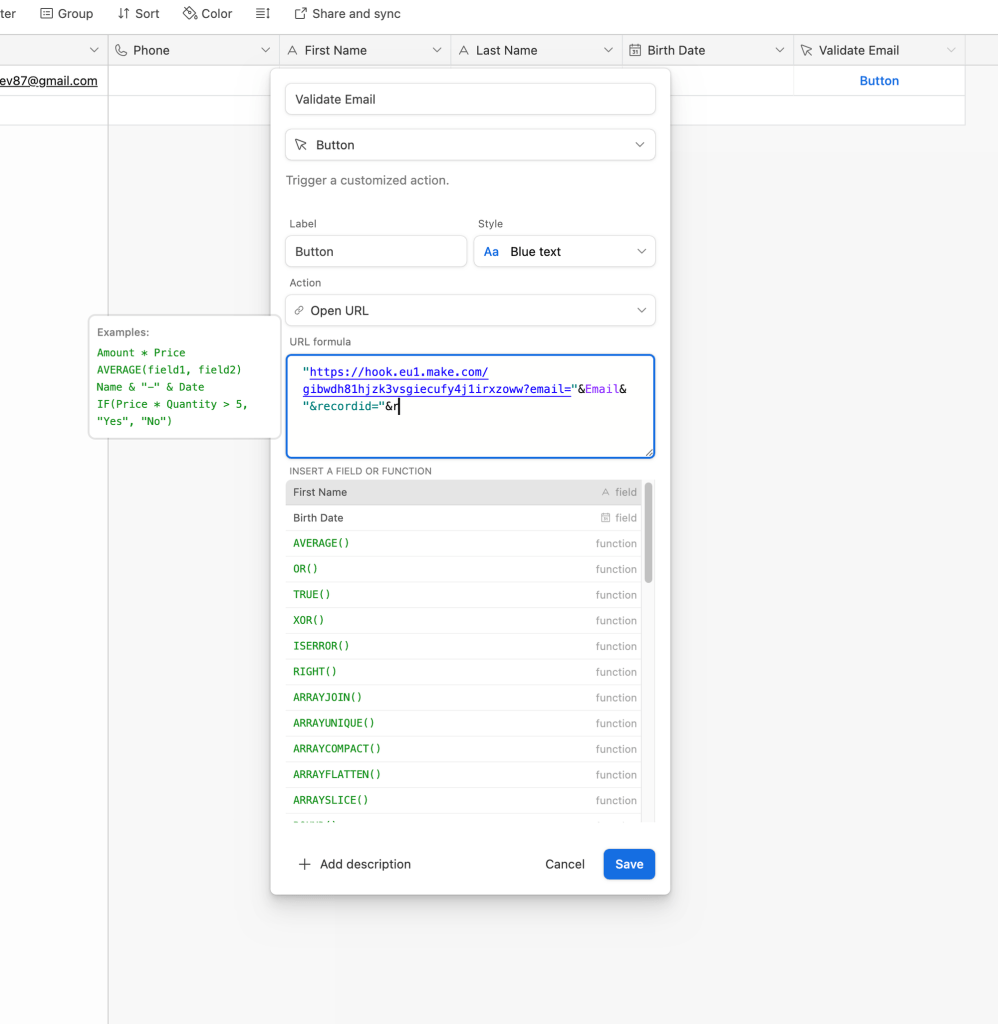
Here is the final representation:

If you want to explore all of Airtable’s button options, you can find them here.
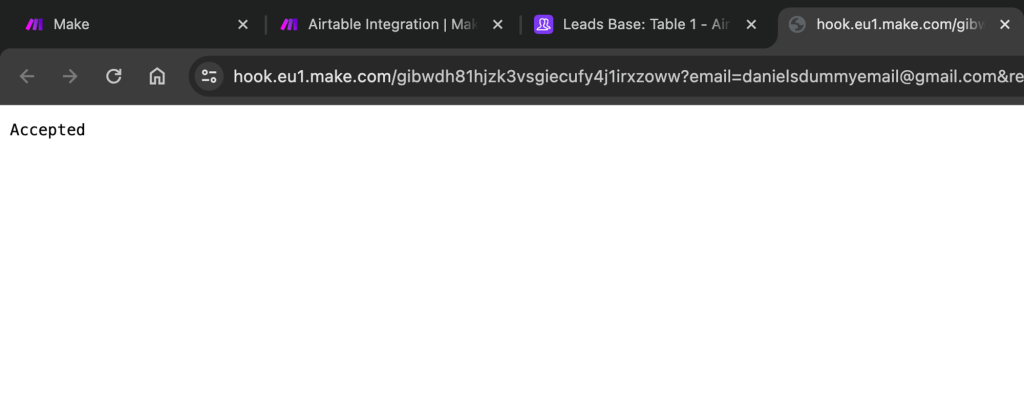
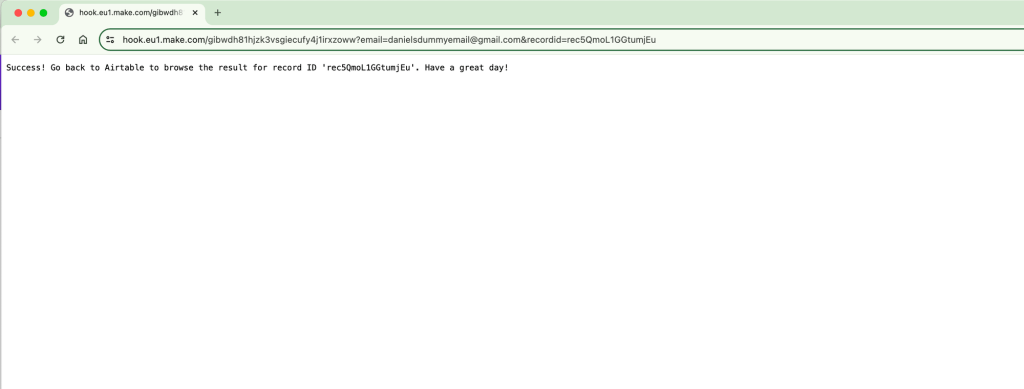
To test the functionality, you can add a new record with dummy data in the base.

Clicking on the button will open a new tab with the word “Accepted”. This indicates that Make has received our webhook, and we can go there to examine the results.
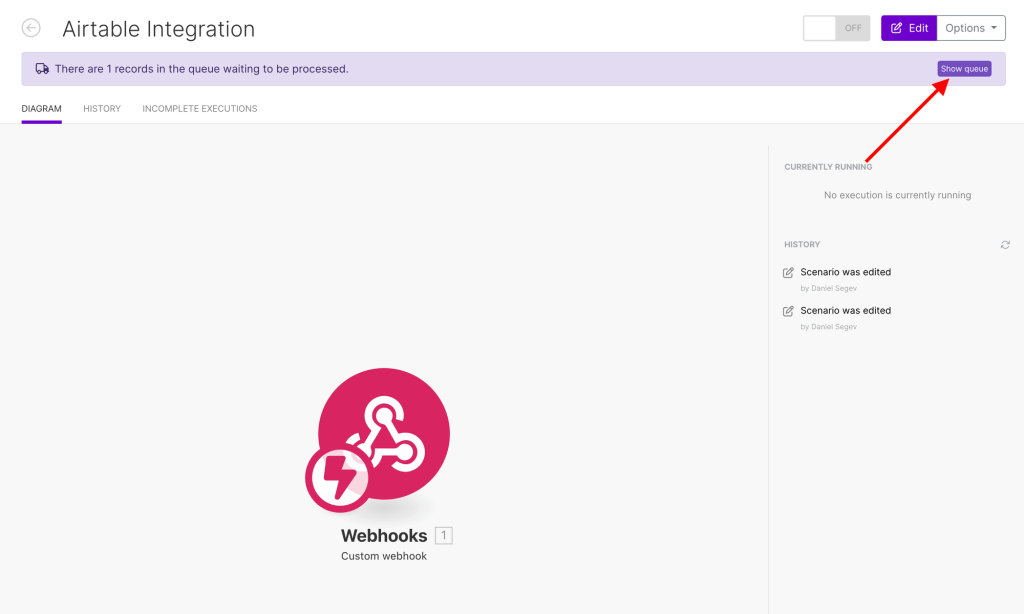
On Make’s side, we can see that we have 1 record in the webhook’s queue. We’ll click on “Show queue” to see what it contains:
We can see that we received the two parameters we added into the button, with the real values from Airtable:

The Main Course – Validating an Email Using a Third Party App
Now we can move on and continue to build our scenario. The next step is to add the email validator. For this, we’ll use Hunter app (hunter.io). Hunter is the perfect app to support our effort in the project, and is very easy to use. After a quick signup, just go to the API section under your profile.
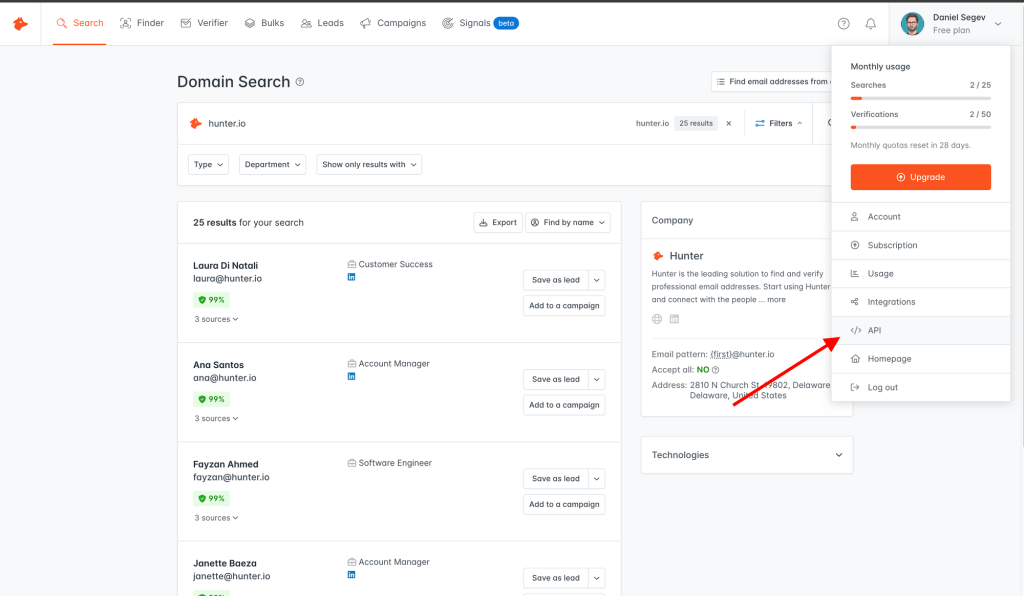
Grab your API key here:

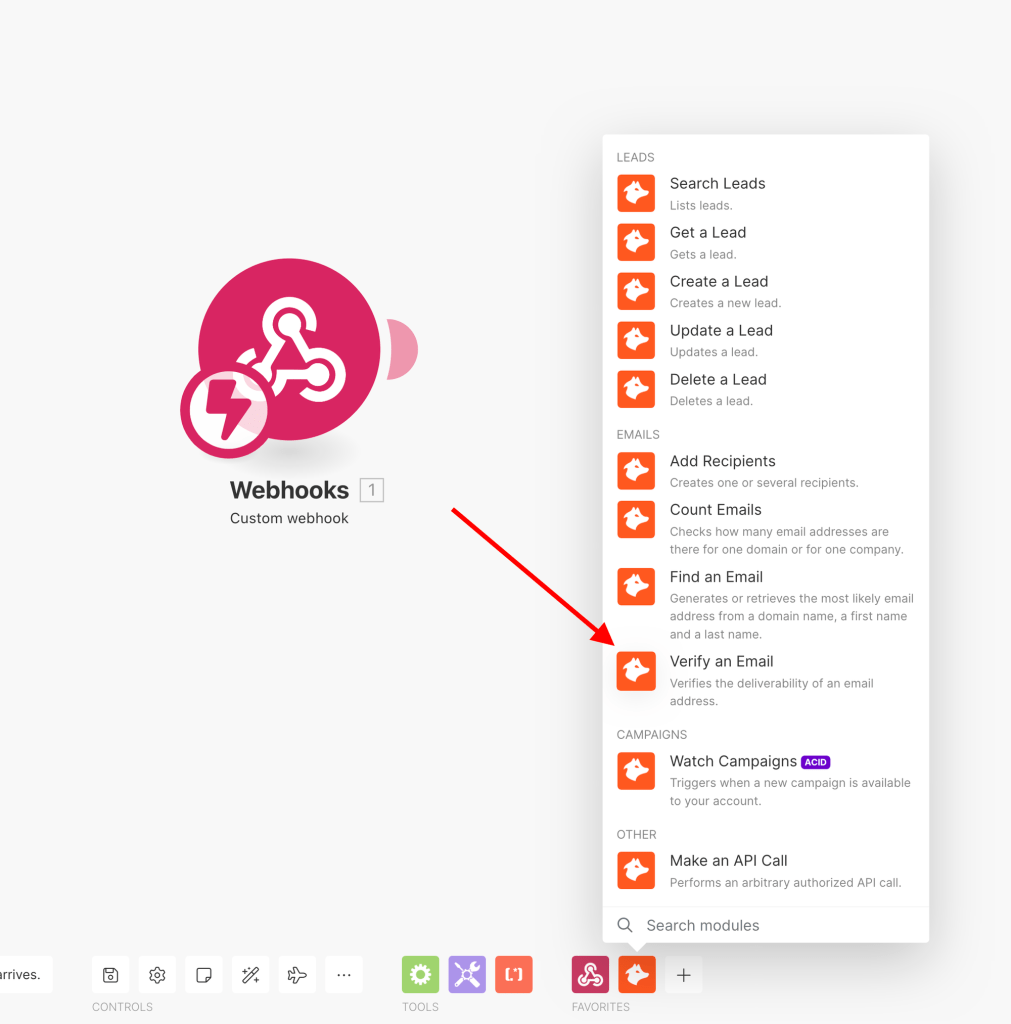
Then, go back to Make and choose the “Verify an Email” module:
Add the Hunter connection using the API key you just copied, and save it.
Then, in the Email box, you can easily map the value received from the webhook.

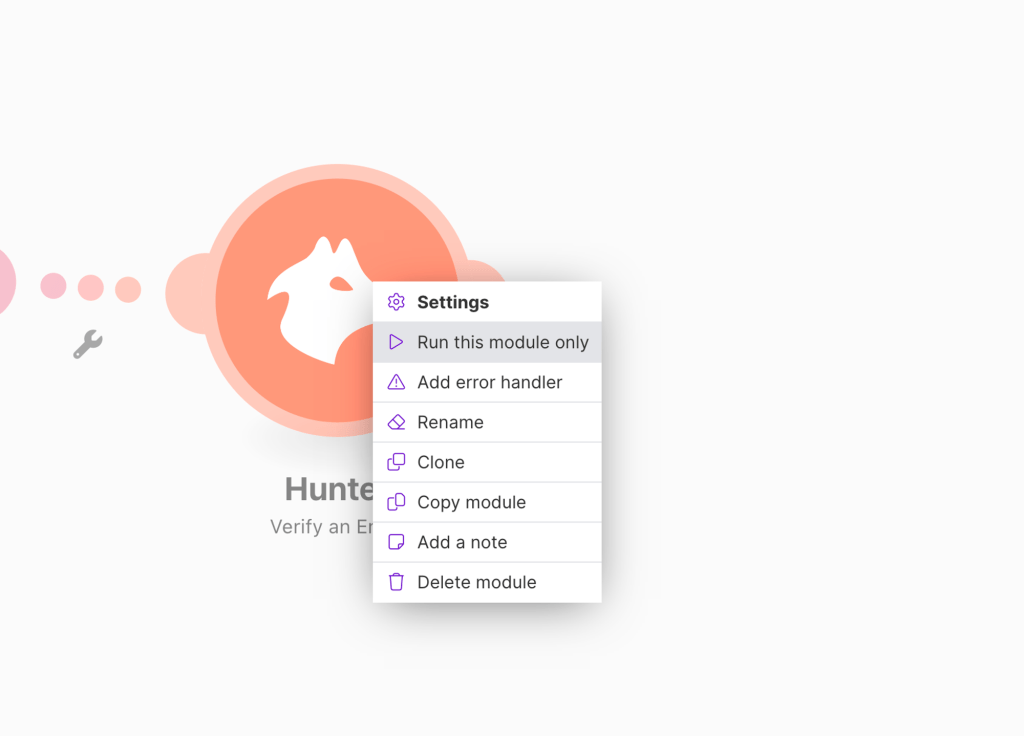
Let’s make a quick test, click right-click on the Hunter module and choose “Run this module only”.
Type in a random email address, click OK, and see the results.
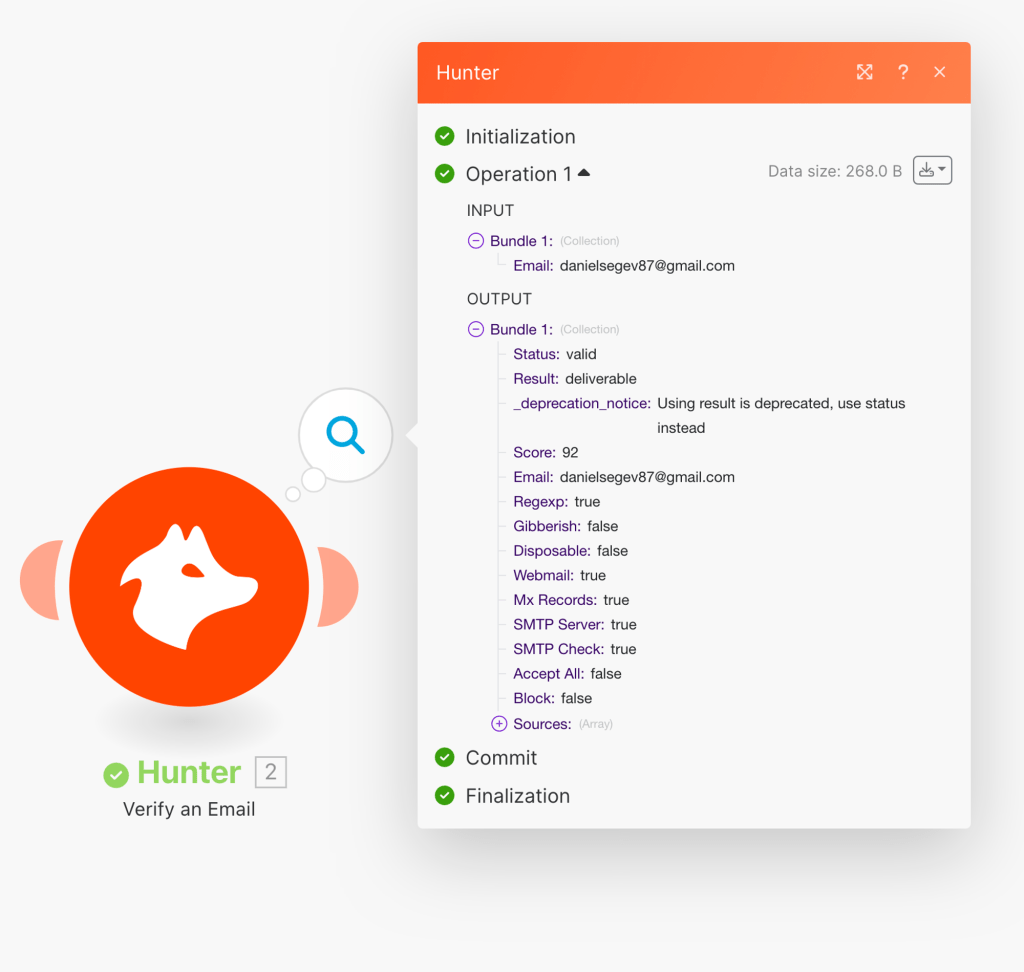
As you can see, my personal email is valid and deliverable, with a high score. Now let’s try a temporary email address generated via Mail Invicta:

As you can see, the result is now marked as “Risky” and the score is much lower. This is because it is an address that will be deleted soon. Therefore, when a lead is generated with such an email, you can be certain that it is not worth your effort to work on it.
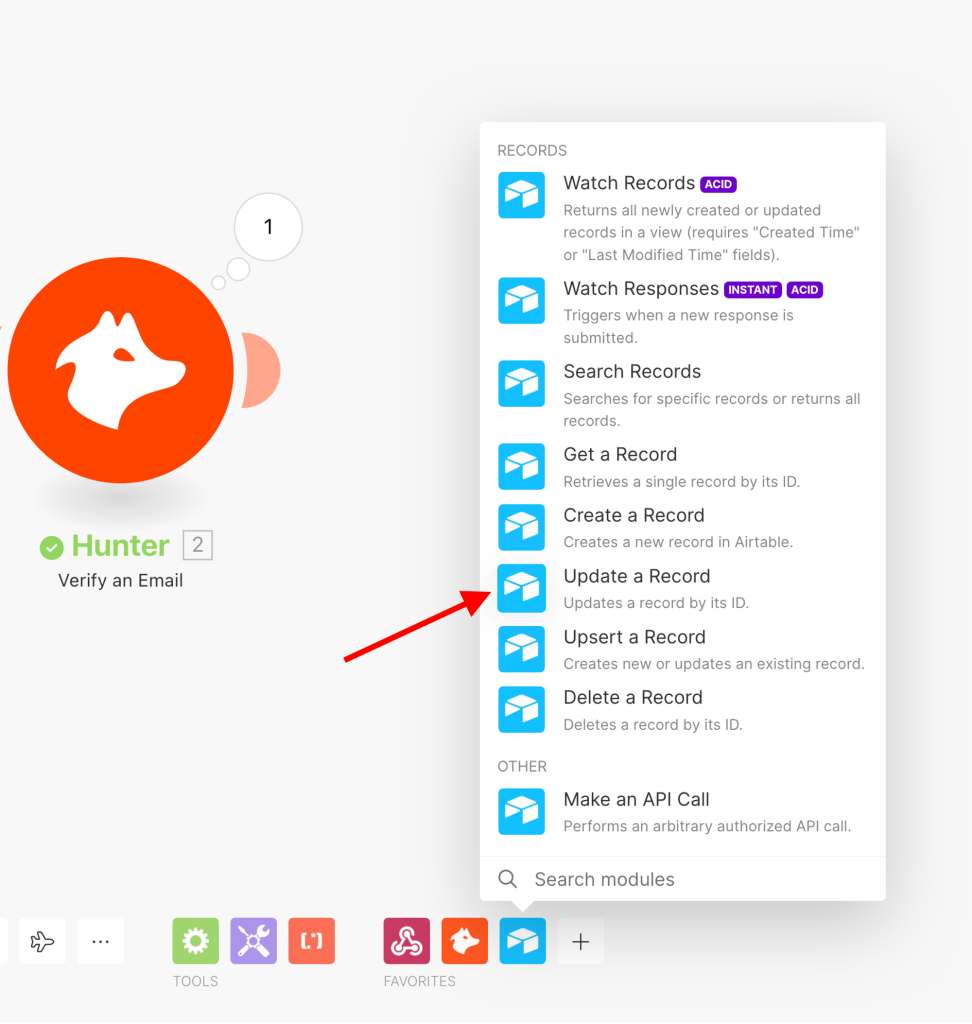
Now, let’s proceed to update our Airtable record with our latest findings. We’ll utilize the “Update a row” module of Airtable.
After establishing the connection, ideally via an OAuth connection, you will need to choose a base and provide the record ID that you want to update. You can easily map the record ID as it was received in the webhook.
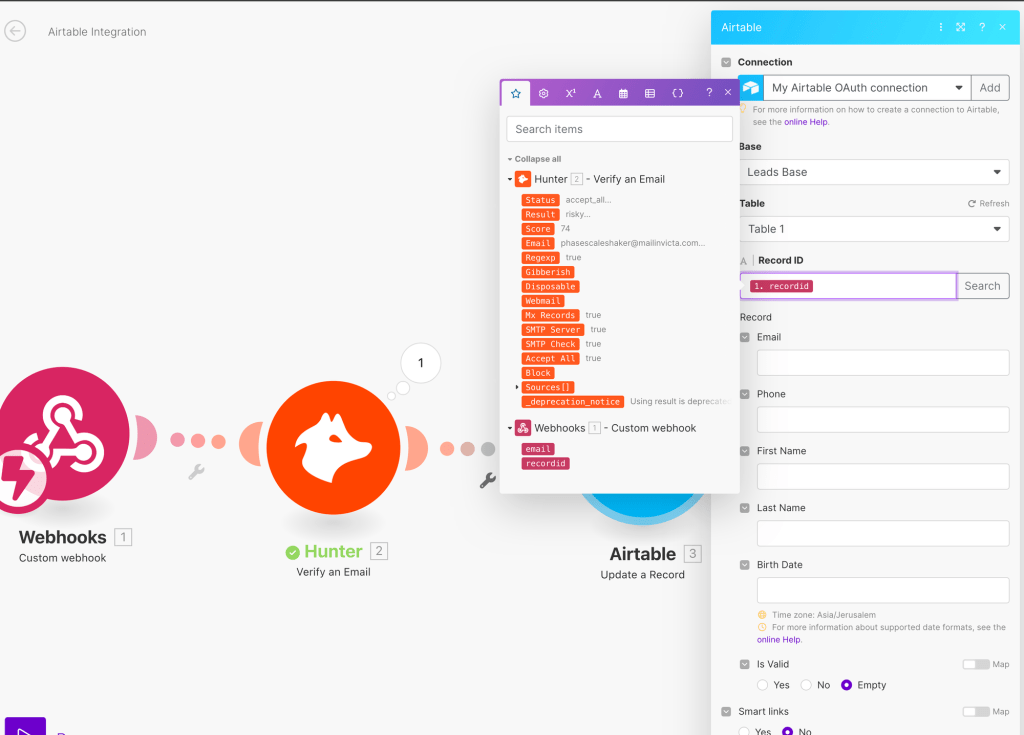
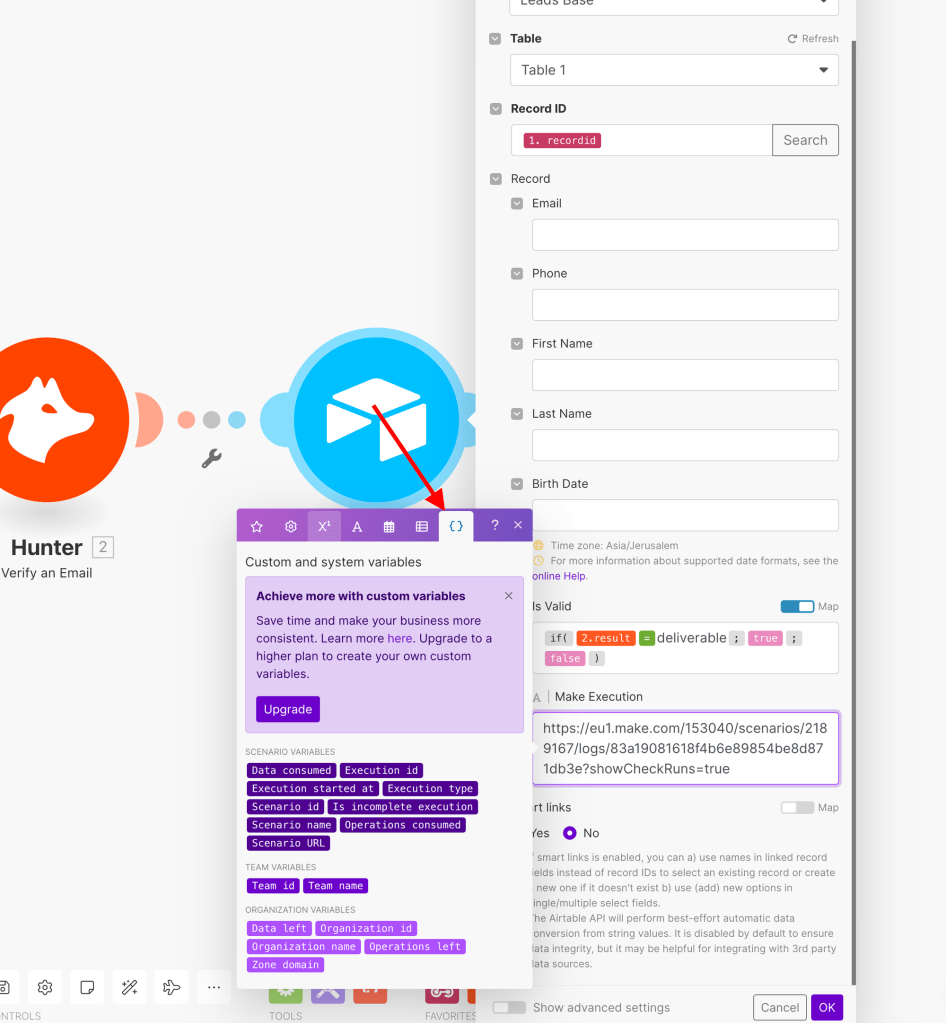
Lastly, we want to update the “Is Valid” field based on the results we got from Hunter. We’ll make a condition based on the field “Result” received from Hunter, and use an IF function within Make. If Hunter’s result field equals “deliverable”, then we’ll mark the check box in Airtable. In any other case, we’ll leave it unmarked. There are few ways to execute it, whether via a router, and each route will update the check box according its condition. I chose to use one module with no router, and use the IF function. For that, we’ll need to click on “Map” above the field:
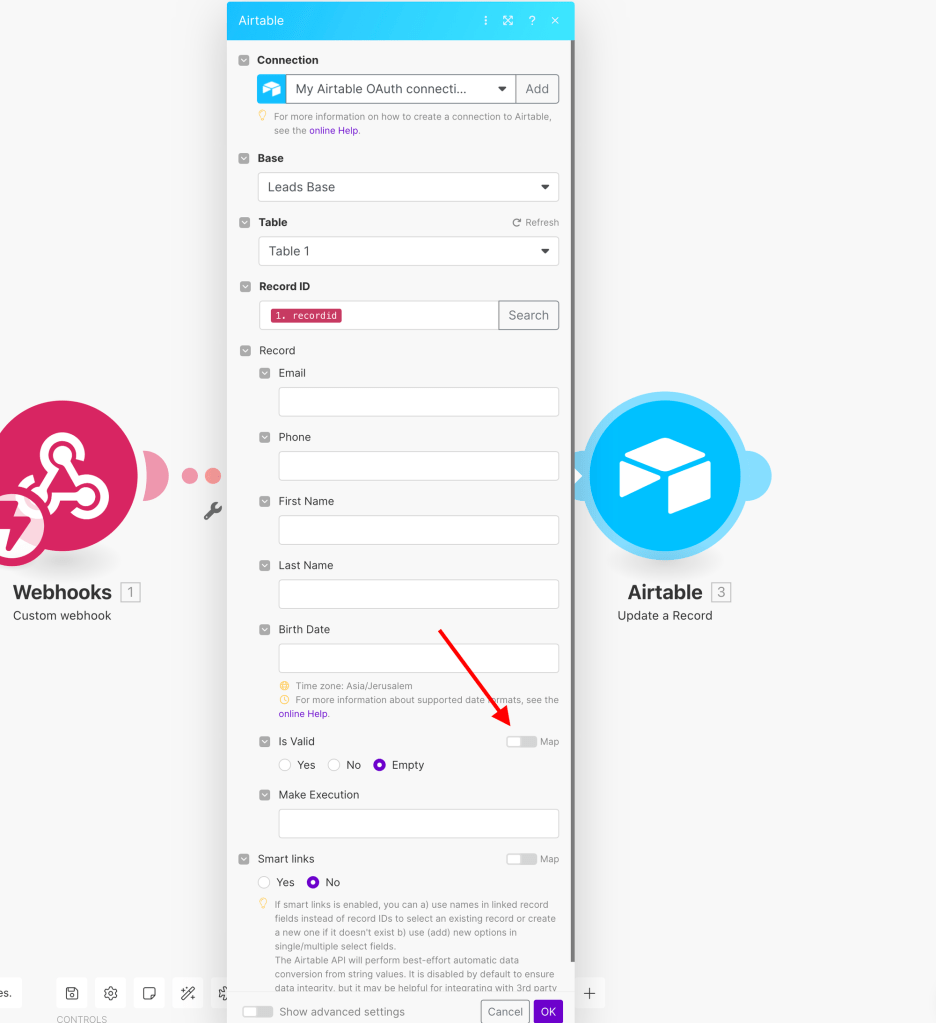
And then write our formula. To mark the field, we’ll need to use the “true” argument, and “false” for the opposite. So our formula will look something like the following:
{{if(2.result = "deliverable"; true; false)}}
And in Make it’ll look like this:

Next we’ll add the score:
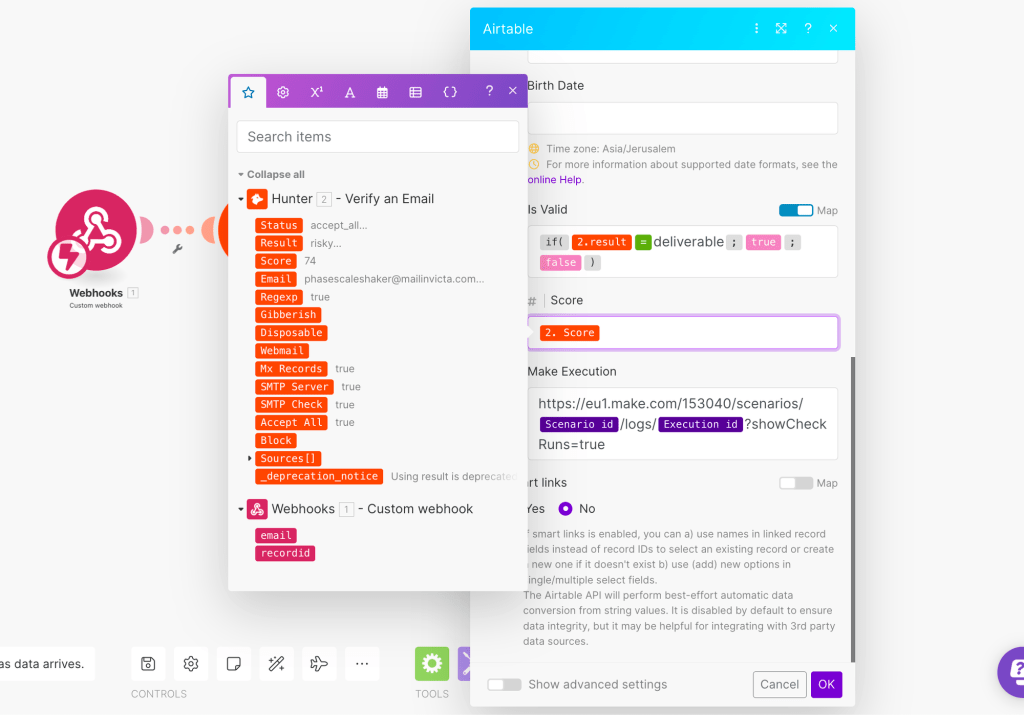
Finally, we will compose the execution URL string in the last field of Airtable. It is highly recommended to do this in order to better track performance and prevent errors in the future. To accomplish this, you can utilize Make’s dynamic values and the execution URL template. To obtain the template, you can access one of the previous runs of the scenario, which can be found here:

After clicking on “Details,” you’ll see the execution’s URL in the browser:
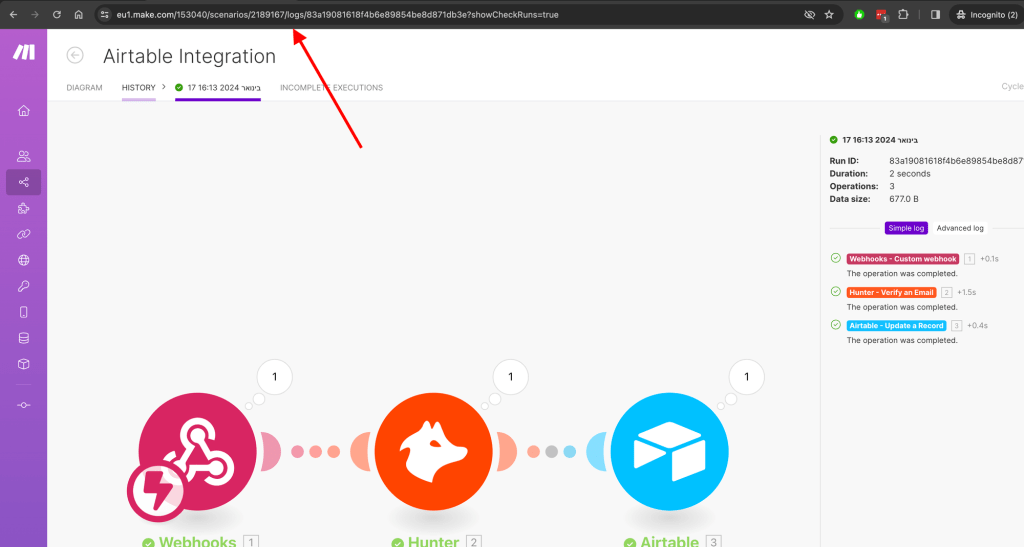
In my scenario, this is the actual URL:
https://eu1.make.com/153040/scenarios/2189167/logs/83a19081618f4b6e89854be8d871db3e?showCheckRuns=true
And this is how the URL is structured:
https://eu1.make.com/{ORGANIZATION-ID}/scenarios/{SCENARIO-ID}/logs/{EXECUTION-ID}?showCheckRuns=true
It means that you can build a dynamic URL for any execution by replacing the static values with the corresponding dynamic variables. Now, let’s go back to the scenario and navigate to the final module. Paste the previous execution URL and modify it. Make provides dynamic variables like the scenario ID and execution ID.
As shown before, you can replace the static values with the dynamic ones, following the structure I’ve just explained. The modified URL will look like the following:

In the code, as it appears in Make, you can use double curly braces to indicate dynamic variables:
https://eu1.make.com/{{var.organization.id}>}/scenarios/{{var.scenario.id}}/logs/{{var.scenario.executionId}}?showCheckRuns=true
This allows you to use the exact same structure to build the execution URL for any scenario you’d like. Click OK and save the scenario.
And that’s it! The scenario is now ready to run.
Now, let’s perform a few more tests using different email addresses.

Bonus – Create a Custom Webhook Response
If you want to customize the default message generated by Make’s webhook after clicking the Airtable button, you can add another module to the scenario called “Webhook response”. This will allow you to customize the response to anything you want.

Place it as the last module in the scenario, add the desired text (which can be combined with variables from previous modules), and click save.

Now test the response after clicking the Airtable button:
Recap
In this blog post, we discussed how to leverage free, no-code tools to enhance your small business efforts. Specifically, we focused on using Airtable and Make to automate the validation of email addresses.
We started by creating an Airtable form to collect leads and defining the table structure. We customized the form view and added backend columns for management purposes. Additionally, we included a “Validate Email” button to trigger the automation process.
Next, we created a Make scenario to handle the email validation process. We used the Hunter app’s email verification API to verify the email addresses. By running the scenario, we were able to test the automation and examine the results.
We then updated the Airtable record with the validation findings using the “Update a row” module in Make. We utilized conditional logic to mark the “Is Valid” field based on the validation results. Additionally, we added fields for the quality score of the leads and, to better monitor the automation process, we constructed a dynamic execution URL in Airtable using Make’s dynamic values. This URL allows us to track the performance and prevent errors in future scenario executions.
By following these steps, you can leverage the power of Airtable and Make to automate the validation of email addresses and efficiently manage your lead generation process. These free, no-code tools offer endless possibilities for enhancing your small business efforts without the need for complex coding or breaking the bank.


Leave a comment