
In 2023, mastering an automation tool is no longer a luxury; it’s a necessity. However, why limit yourself to just one? Each tool offers unique advantages, whether it’s in terms of UI/UX, connectivity, pricing, or other features tailored to your specific needs. By integrating multiple tools, you can harness the strengths of each, achieving your goals more efficiently.
While I have a personal preference for the automation tool “Make”, there are instances where I lean towards Zapier. The reason? Zapier sometimes provides more extensive connections and functionalities that can significantly enhance my workflow.

For instance, when I sought a swift and straightforward solution for TikTok lead generation, I discovered that Zapier had the required connection, whereas Make did not. Instead of creating a custom project to integrate TikTok with Make via API, I utilized Zapier as an intermediary, effectively expanding Make’s connection capabilities in no time.
Let’s delve into how you can seamlessly integrate these two platforms:
1. Setting up Zapier:
Log in to your Zapier account and initiate a new Zap.

For the trigger, opt for the “TikTok Lead Generation” module. Ensure you’re using the most recent version.

In the “Event” dropdown, select “New Lead”. Authenticate and grant TikTok the necessary permissions. Under “Trigger”, specify the ad account and form ID. If no form is selected, the trigger will apply to all forms within the chosen ad account.

2. Configuring the Action in Zapier:
After setting up the trigger, move on to the “Action” phase. Here, select “Webhooks by Zapier” and choose the “POST” event.

Pause your work on Zapier momentarily. Switch to Make to lay the groundwork for our integration.
3. Setting up Make:
In Make, initiate a new scenario. For the first module, opt for “Zapier”. Within its triggers, select “Receive data”.


Generate a new webhook URL, which you’ll later input into Zapier. Copy the provided URL.

Return to your Zap in Zapier and paste the copied URL.

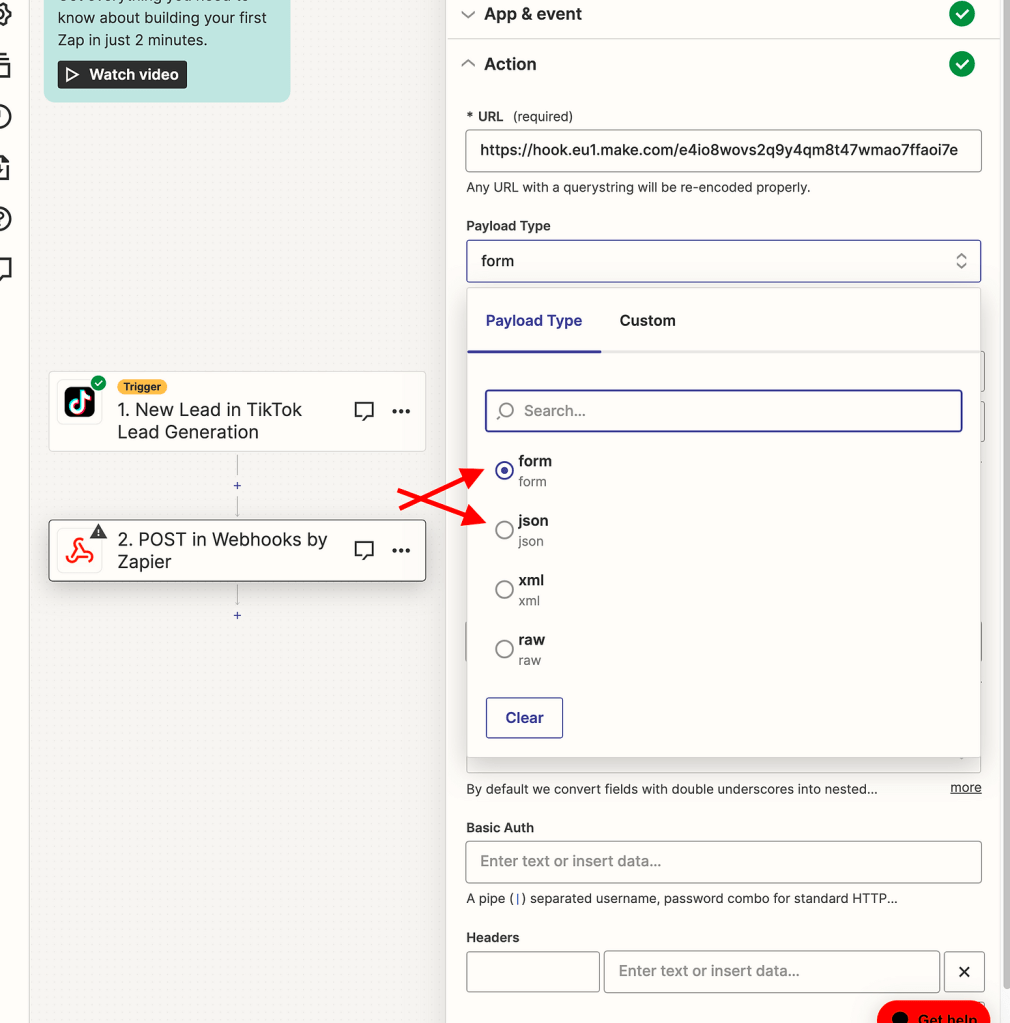
For “Payload Type”, you can opt for either “form” or “json”. While Make can interpret various types, we’ll stick to these common choices.
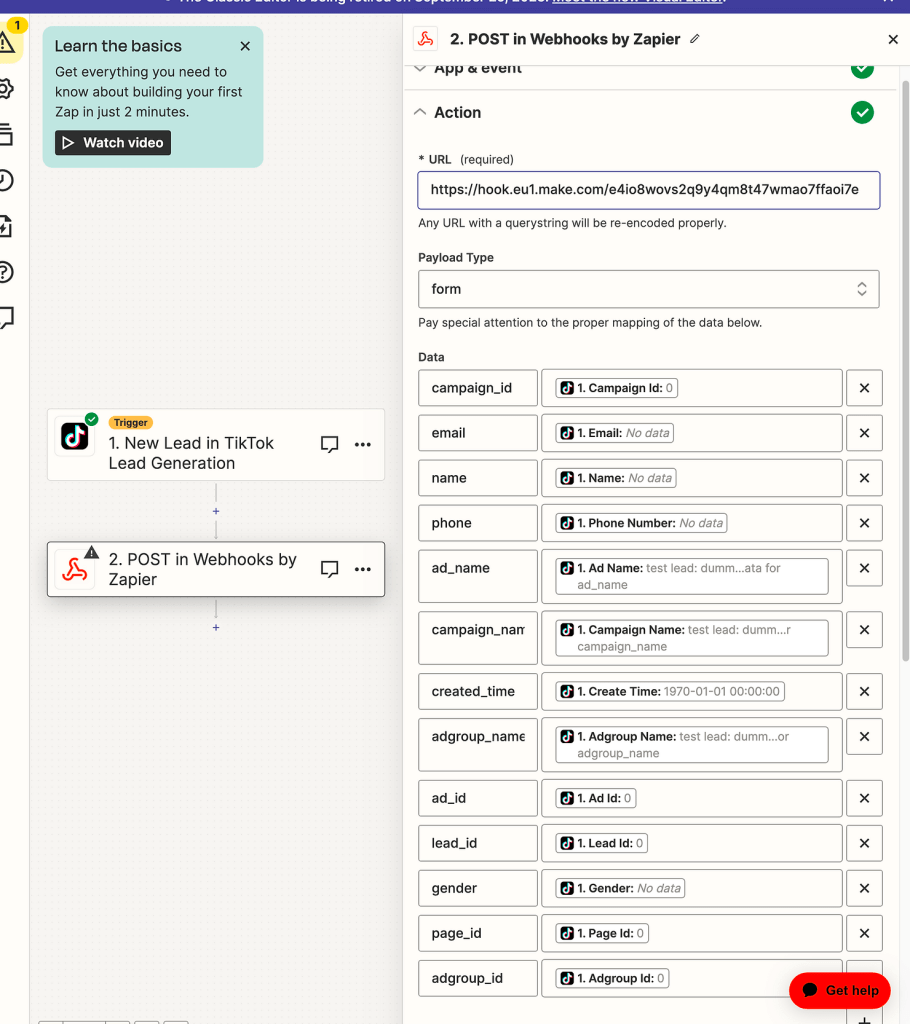
Map the data from the TikTok trigger to the webhook. Define each field’s name and its corresponding value. This mapping is based on the data Zapier provides post-trigger testing.

4. Data Management and Final Steps:
Initially, I recommend mapping all available data. Later, in Make, you can decide which data points to utilize.
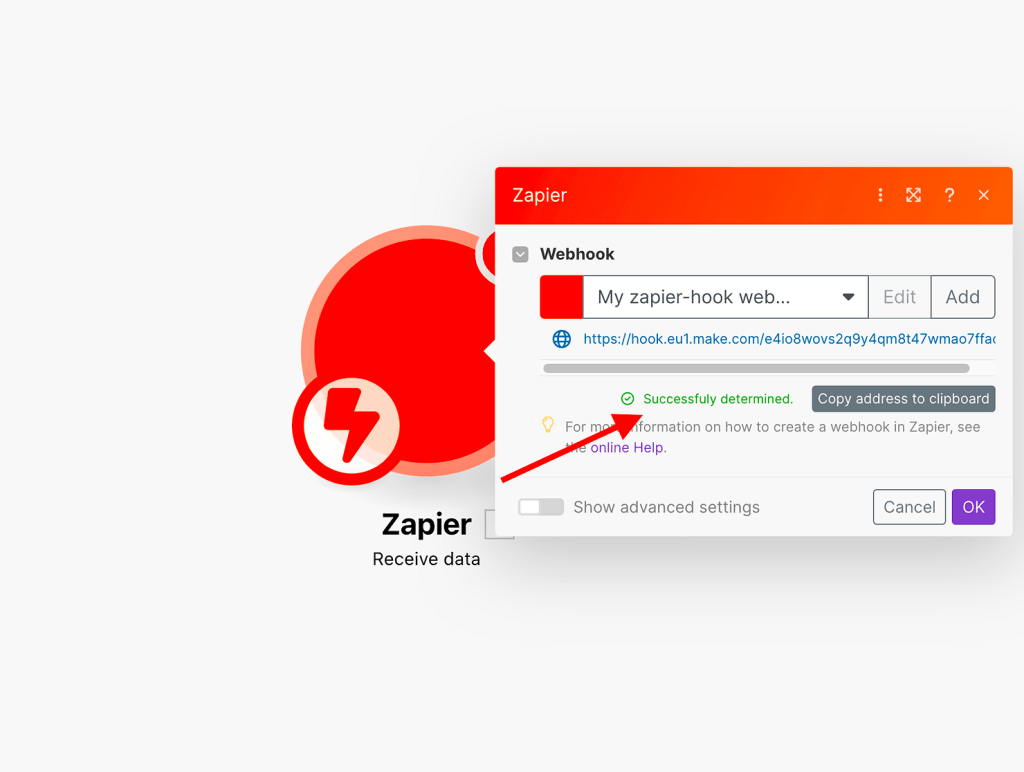
After configuring the webhook, click “Continue” and test the setup.


Once tested, you’ll receive confirmation on both Zapier and Make.

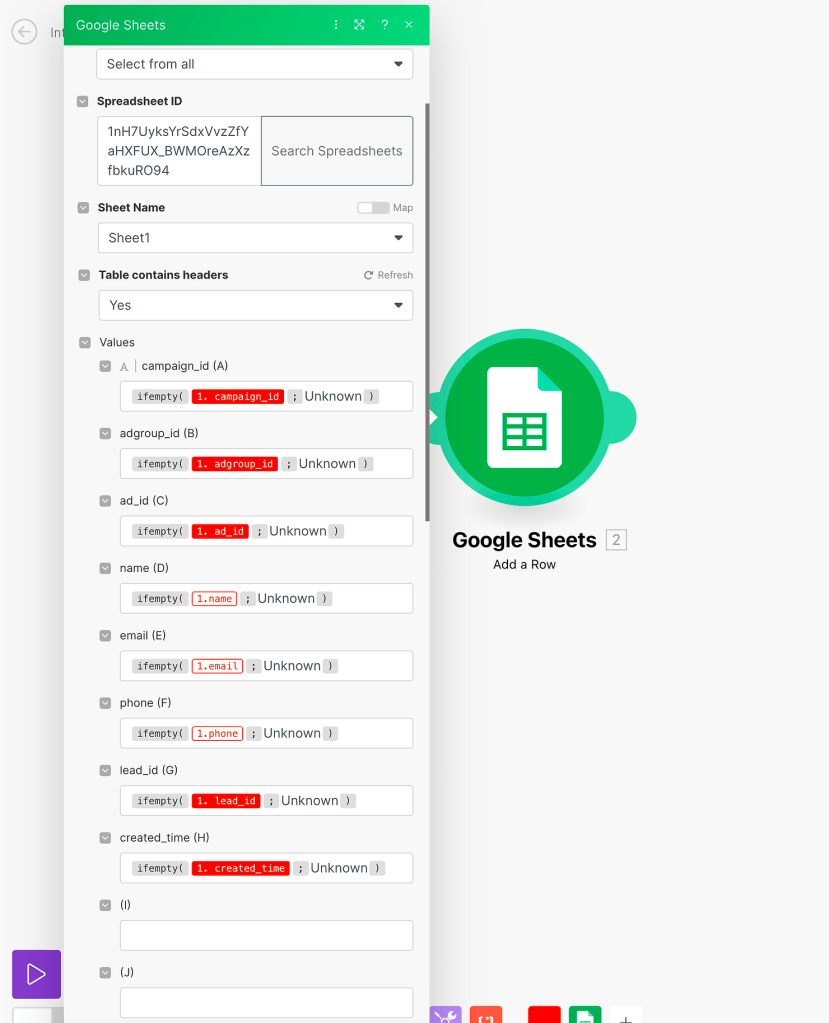
With Zapier’s part complete, you can now manipulate the data in Make. For this tutorial, we’ll transfer the data from Zapier to a Google Sheet.


Note: Some data, like lead’s email or name, might not be available during testing. In such cases, adjust the parameter placeholders accordingly in Make.
After all configurations, send a test from Zapier to populate the Google Sheet.


By following these steps, you can effectively use Zapier as a data bridge for Make, especially for integrations that Make doesn’t natively support.
Pro Tip: The Zapier module in Make functions similarly to a custom webhook. If you prefer, you can use the custom webhook option in Make and follow the same steps as outlined above.


Leave a comment